Space Administration
Space Administration is where you manage various administrative properties of your Space. This includes creating and editing users, assigning roles and permissions to users, adding and editing Locations, and setting your overall Space properties, including your subscription.
Users
The Users module is used to control the users that are associated with a Space.
Click on ‘Users’ on the main toolbar of ‘Space Administration’ to open the ‘Users’ module.
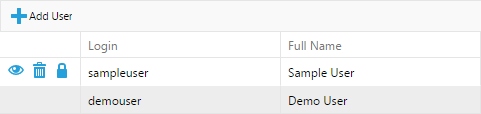
This view will show all of the users associated with the Space as well as their information.
Adding a User
To add a user to a space, click  . This will bring up the User
Editor. You can then edit various information about the user.
. This will bring up the User
Editor. You can then edit various information about the user.
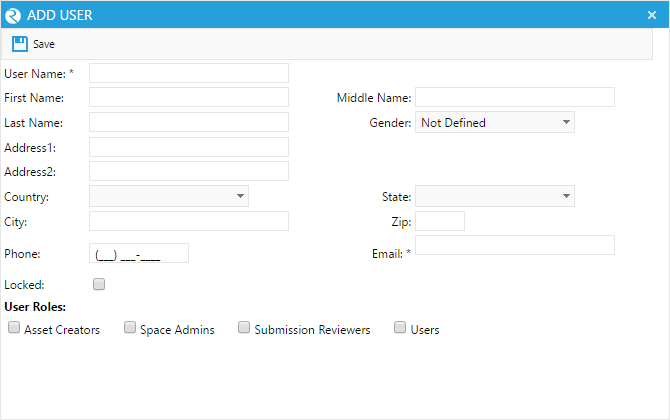
The properties that deal with ReachLite are:
- Locked: If this box is checked, the user cannot log in
- User Roles: Check the boxes with the roles you want to assign to the user (Roles are explained in the next section).
Click  to save your changes.
Viewing and Editing User Details
To edit a user, click on the  button beside their name. This
will bring up the User Editor (see ‘Adding a User’ for information on
editing user properties).
button beside their name. This
will bring up the User Editor (see ‘Adding a User’ for information on
editing user properties).
To delete a user, click on the  button beside their name.
To reset a user’s password, click on  the button beside their
name. The user will receive a temporary password by email which they
will have to change upon logging in.
the button beside their
name. The user will receive a temporary password by email which they
will have to change upon logging in.
Roles
A ‘Role’ is a set of actions that a user is allowed to perform in ReachLite. Different users can be permitted to perform different actions based on standard built-in roles or custom made roles.
Click on ‘Roles’ on the main toolbar of ‘Space Administration’ to open the ‘Roles’ module.

This view shows all of the built-in roles users can have in ReachLite. These roles can later be given to a user.
Adding/Editing a Role
To add a role, click  . This will open the Role Editor.
To edit a role, click the button beside the role’s name.
This will also open the Role Editor:
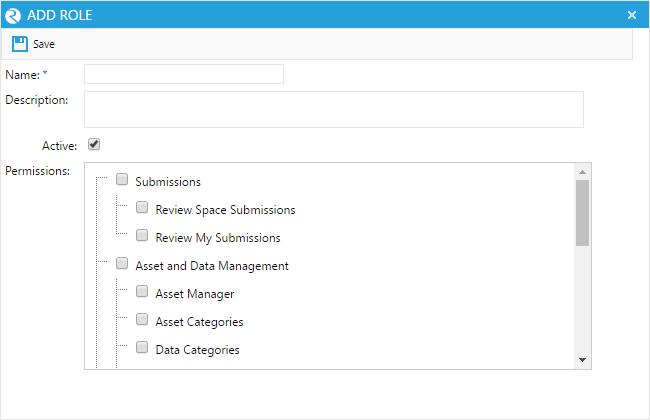
You may edit the following properties of the role:
- Name: The name of the role (required).
- Description: A description of the role.
- Active: If checked, then this role can be assigned to users.
- Permissions: This is where you define the properties of the role. By checking the appropriate boxes, it will set the respective permissions that a user will have if the role is assigned to them.
When you are done editing a role, click  to save your
changes.
to save your
changes.
To delete a role from the list, click the button beside
its name.
Locations
‘Locations’ can be used to group and organize Apps that may pertain to a particular physical location. For example, you may want to make a lot of Apps that pertain to a hospital building, so grouping all of them together into one location would be beneficial.
Click on ‘Locations’ on the main toolbar of ‘Space Administration’ to open the ‘Locations’ module.

This view shows all locations that your App can be assigned to.
Adding/Editing Locations
To add a Location, click  . This will open the Location
Editor.
. This will open the Location
Editor.
To edit a Location, click the button beside the Location
name. This will also open the Location Editor:
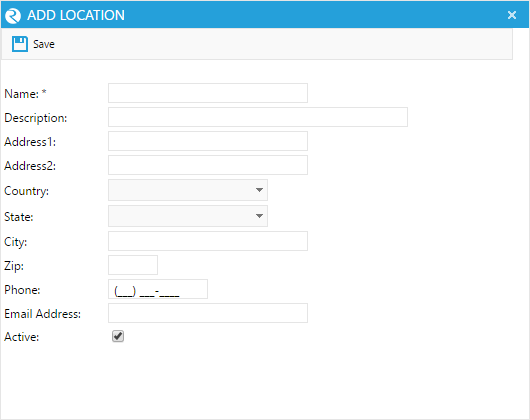
In the Location Editor, you can add all the information you need that pertains to the physical location you are representing. The only required field is the Name field, and all others are optional. Check the Active checkbox to allow this Location to be assigned to your Apps.
When you are done editing a location, click to save
your changes.
To delete a location from the list, click the button
beside its name.
Space
Your general Space preferences and an overview of your ReachLite usage are available in the ‘Space’ page of the administration tab. You can also use this page to change your ReachLite plan.
Click on ‘Space Manager’ on the main toolbar of ‘Space Administration’ to open the ‘Space’ page.
There are various modules on this page, explained in the subsections.
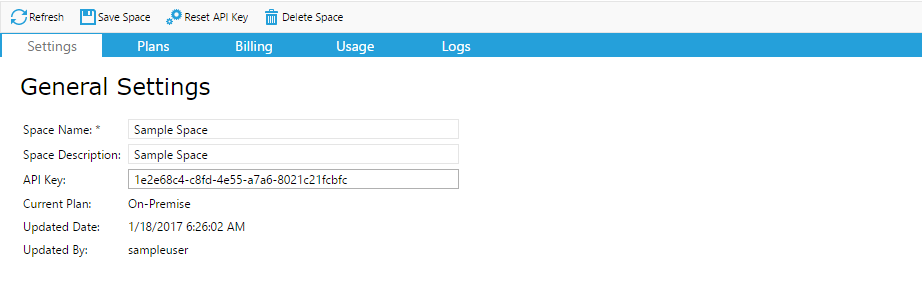
General Space Properties and Actions
The ‘General’ module and the general Space buttons are used to edit general preferences of your Space:
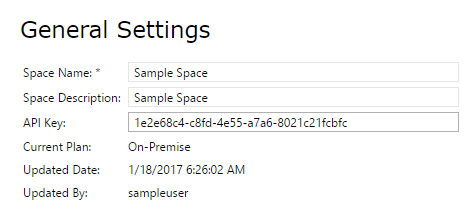
- Space Name: The name of your Space.
- Space Description: A description of your Space.
- API key: Your API key is used to access the contents of your space externally. It is similar to a password for your space that will allow you to access it outside of ReachLite.
- Current Plan: The current usage plan that your Space is under, which can be changed in the ‘Plan’ module.
- Updated Date/Update By: When and by whom the Space was updated.
Click  to refresh the Space page.
Click  to update your changes to your Space.
Click  to reset the API key to Space.
Click  to delete your Space.
Warning: Deleting you space will delete EVERYTHING that your space contains. This includes ALL Apps, Submissions, Users, Roles, etc. This option should not be used unless you are sure you want to delete your space.
Usage
Your current usage statistics are displayed in both the Current Usage Charts and the Usage table:
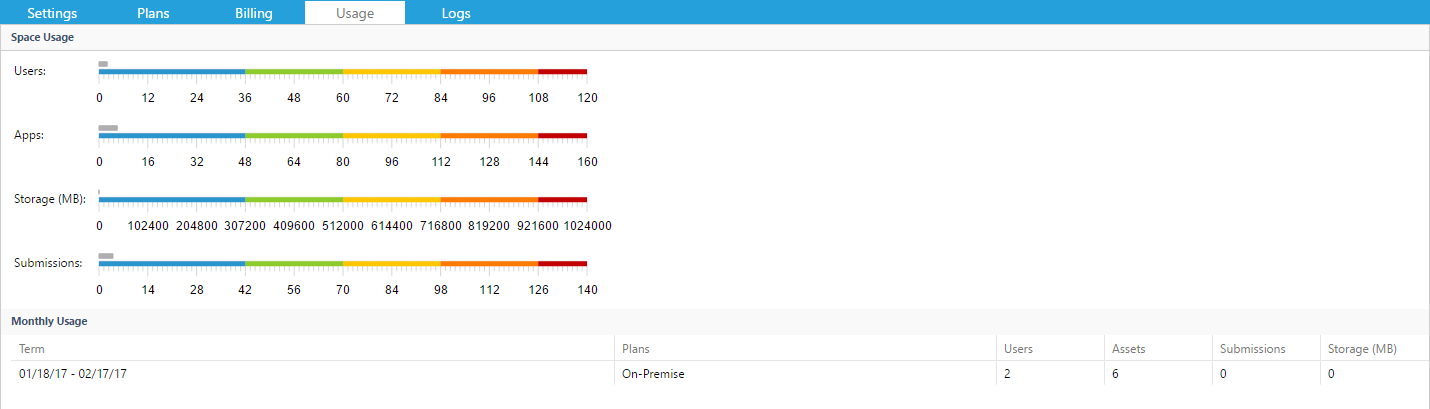
The Current Usage Chart contains a visual overview of your space usage. It shows how many Users, Apps, and Submissions are connected to your space (shown as Current), as well as how many are still available (shown as Available) for use based on your plan.
Below the chart, the Usage table shows your Space usage per plan term. A term is either one month from the day of your account creation date, or one month from the date of the previous plan change. Consult your plan terms to see how much usage you are allowed in your current term.